GSoC Week 9: A fair share of Multiplayer
What have I been upto?
The Revival Stone created last week has been polished and is now renamed as the Altar Of Resurrection. All the existing traps and adventure items- Swinging Blade, Wipe Out, Fireball Launcher, Altar of Resurrection and Password Door have been made multiplayer ready.
Altar of Resurrection
With most of the work been done last week, this week simply saw a finishing touch and some other minor additions.
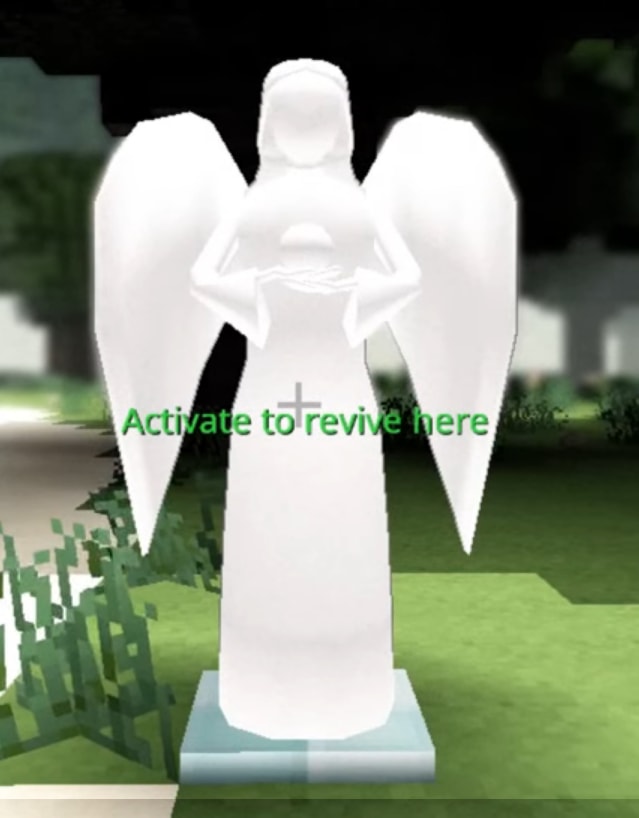
Floating Text
Instead of sending a chat message to describe the state of the Altar of Resurrection, a better idea was to have a floating text that appears when the angel statue is targeted. The floating text now looks like-

New Particle Effects
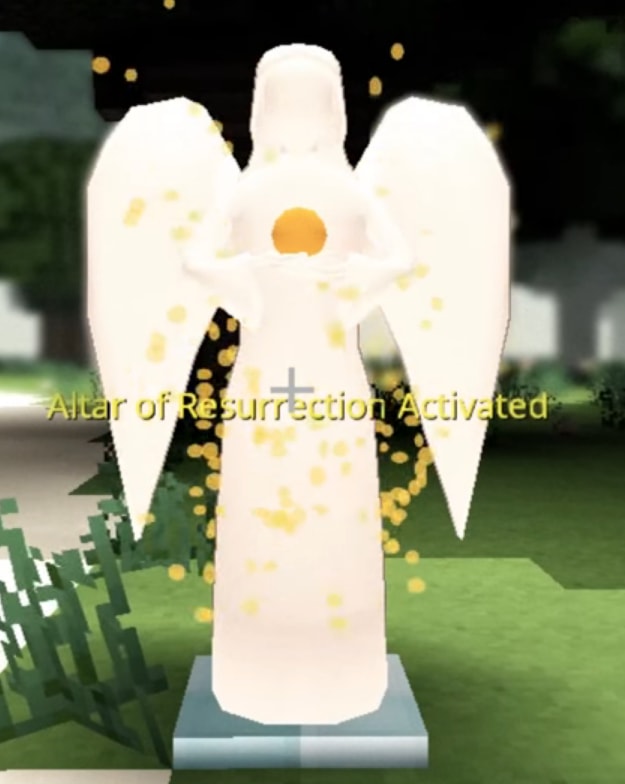
The blue opaque Particle Effects have been switched to transparent orange ones, that match with the theme of the angel. The orange color goes along with the color of the orb.

- Open a new file in Paint.NET.
- Resize the canvas to the desired size (e.g. 32x32).
- Select all (Ctrl + A) and delete. This would leave you with a empty transparent canvas.
- Select the Shapes tool and select Ellipse.
- In the shape styles menu select "Draw Filled Shape".
- Select the desired color for fill.
- From the color toolbar, select "More >>" and adjust the "Opacity- Alpha" value to make the color transparent. For e.g. if you need 50% transparency, set Opacity to 128.
- Drag the cursor to draw the ellipse on the canvas. The image can be then resized and adjusted. The color can also be adjusted later to see a live preview.
After all this, the final Alar of Resurrection looks like this-
Multiplayer Fixes
A large amount of last week went into making the already created traps functional in multiplayer. Here is a brief collection of the issues I faced and how I solved them. Please read through the wiki page for Entities, Components and Events on the Network if you already haven’t.
Entities on the network
An entity on the network (one that has a Network Component) exists both on the server and the client. This poses a problem if you are depending on a component addition/activation event to perform an activity. For eg- For the wipe out trap, the mesh for the model was to be created only on the client side. This was supposed to happen on the OnActivatedComponent event for the components = {WipeOutComponent, BlockComponent} which would trigger when the WipeOutRoot block is placed in the world. However, this event gets triggered twice, on the Client System once for the server entity and once for the client side entity. This creates two meshes- one that stays stationary and the other that rotates as expected. Note that the Authority/Server system only has the event handled once since it gets triggered only for the server entity.
As a workaround to fix this, I received the event on the Authority system with a higher priority. The Authority system event handler would then make changes to the server entity’s WipeOutComponent (add the rod and surfboard collider entities to the childrenEntities list). I would then receive the event on the Client system and recognize the server entity by these changes that have been made. The client entity would not have the changes made by the Authority system (the childrenEntities list would be empty). The Client System event handler for the OnComponentActivated event would now run only for the server entity and the extra static mesh would no longer be created.
The Server System event handler looks like-
@ReceiveEvent(priority = EventPriority.PRIORITY_HIGH, components = {WipeOutComponent.class, BlockComponent.class})
public void onWipeOutActivated(OnActivatedComponent event, EntityRef entity, WipeOutComponent wipeOutComponent) {
// Create server entities for rod and surfboard
wipeOutComponent.childrenEntities.add(rod);
wipeOutComponent.childrenEntities.add(surfboard);
}
The Client System event handler looks like-
@ReceiveEvent(components = {WipeOutComponent.class, BlockComponent.class})
public void onWipeOutActivated(OnActivatedComponent event, EntityRef entity, WipeOutComponent wipeOutComponent) {
// So that only the relevant server entity is operated on.
if (!wipeOutComponent.childrenEntities.isEmpty()) {
// Create mesh entity on client side
}
}
Saving Component of an Entity
Before going into the specifics of the issue I faced, let’s discuss how the @Replicate annotation works.
Straight from the wiki-
@Replicateis an annotation used to mark types or fields to indicate that these types or fields should be replicated between the server and the client. In other words, when changes are made to these types or fields on the server, these changes will be reflected in the clients as well.
By default, the FieldReplicate type is set to SERVER_TO_CLIENT. This basically means that whatever the state of the entity on the server, such will be replicated to the entity on the client side. Changing a component on the client entity would not be reflected on the server entity.
Since all of the traps I made were on the network (possessed a NetworkComponent and had entities on both the client side and the server side), altering their settings required a change in one of the components. For instance, let’s consider the Fireball Launcher. On interaction with the Fireball Launcher block, the player sees a Settings screen where he can alter the properties for that Fireball Launcher. On hitting “Ok” on the Settings window, the component change happens from the FireballSettingsScreen class which is launched on the client side and instantiated with the client side Fireball Launcher Root entity. The component change thus happens only on the client entity and isn’t taken into account by the server entity.
To solve this, I created a new event- SetFireballLauncherEvent. This event basically carries all the new values that need to be applied to the FireballLauncherComponent. The event is then received on the Authority/Server system which then makes the change on the server side Fireball Launcher entity. This change is then reflected on the client side Fireball Launcher entities as they replicate the changes made to the server entity. The event can however not be sent to the FireballLauncherRoot entity from the FireballSettingsScreen class. This is because the FireballLauncherRoot entity that the player interacts with, is the client side entity. Making the change on the client side entity would not make the change register on the associated server entity. Instead, the event can be sent to the local player’s character or client entity with the FireballLauncherRoot entity as a parameter.
How does the chest work?
All these issues I faced, made me wonder how the chest entity works. The chest opens an Inventory screen on interaction. It has an InventoryComponent and any change made by one client is reflected on any other client.
The chest entity has the network component and has @Replicate on all relevant component fields to ensure that the state is replicated from SERVER_TO_CLIENT. Again, whatever the state of the server entity, so will be replicated on the client. Since the entity has a Network Component, it exists on both the client side and the server side. Consider a client opening the chest (by interaction) and adding a sand block to it (the inventory of the chest). This action is performed on the local entity (the one on that client’s side). So simply saving the new InventoryComponent (with an added sand block) on the client side in the client system won’t work since all client chest entities replicate the state of the server entity, which remains unaltered. To deal with this, the component change must happen on the server entity which can be accessed only at the Authority system. This can be made possible by sending an event that is received and handled by the Authority/Server system. Note that the event cannot be sent to the client side chest entity (since the player interacts with the client side chest entity, not the one that exists on the server). However, this event can be sent to the player’s character entity with the chest entity as a parameter of the event. The event can then be received and the server side chest entity can be saved with the new InventoryComponent.
Note: Making a change to the client side entity can be done to register the change on the associated server entity. But this requires the entity to be owned by the player and the FieldReplicateType to be set to OWNER_TO_SERVER_TO_CLIENT.
Citing from code-
InventoryClientSystem sends an event on the local player’s client entity here.
InventoryAuthoritySystem receives the event and does its thing here.
Note that some of my approaches might be incorrect. I’m not a hundred percent sure about whether the above is the right way to deal with the issues. However, having had a glance at how the Inventory stuff is handled for the chest entity, I’m more or less convinced that it is the right way.
What’s next?
Maybe a few more traps like a pressure plate and some more triggers like buttons and levers. The major part that’s really left is to integrate all of what’s made into a world and package it into the Lost module with the supporting Lore.